

If you know me, then you know we were in trouble from that moment on. My first project was to create a tabletop for an old map case that we kept stashed in the garage due to it's lack of a top. It turned out okay--so I next built a table for our kitchen modeled off of one I love from Restoration Hardware and I liked the results. With my newfound confidence I decided it was time to tackle a bigger project: Bunk beds!
When I told people I was busy building bunk beds for Yaya and Lulu, most of them shrugged and probably thought, what's the big deal? What they didn't realize is these were the greatest bunk bed plans I had ever seen! The designer and builder of the Sweet Pea Bunk Beds is Jenny from Birds and Soap and after following her meticulous plans she is one of my heroes as well.
When I commenced on this BB journey, one of my goals was to try to make it as affordable as possible. I figured if I could show others how to make it more affordably than the $500 plus that others were spending to make one, that I could somehow inspire someone else.
 |
| Our jointer "Butch" |
One night I was finishing up a batch of wood around 10:30, when I decided to surface the face of one more board, as I guided the board along, the blades hit a knot hole and sent the board flying. My right hand, which had been applying gentle downward pressure to the board flew forward and landed right on the blades. After cleaning up the gore, this is the damage:
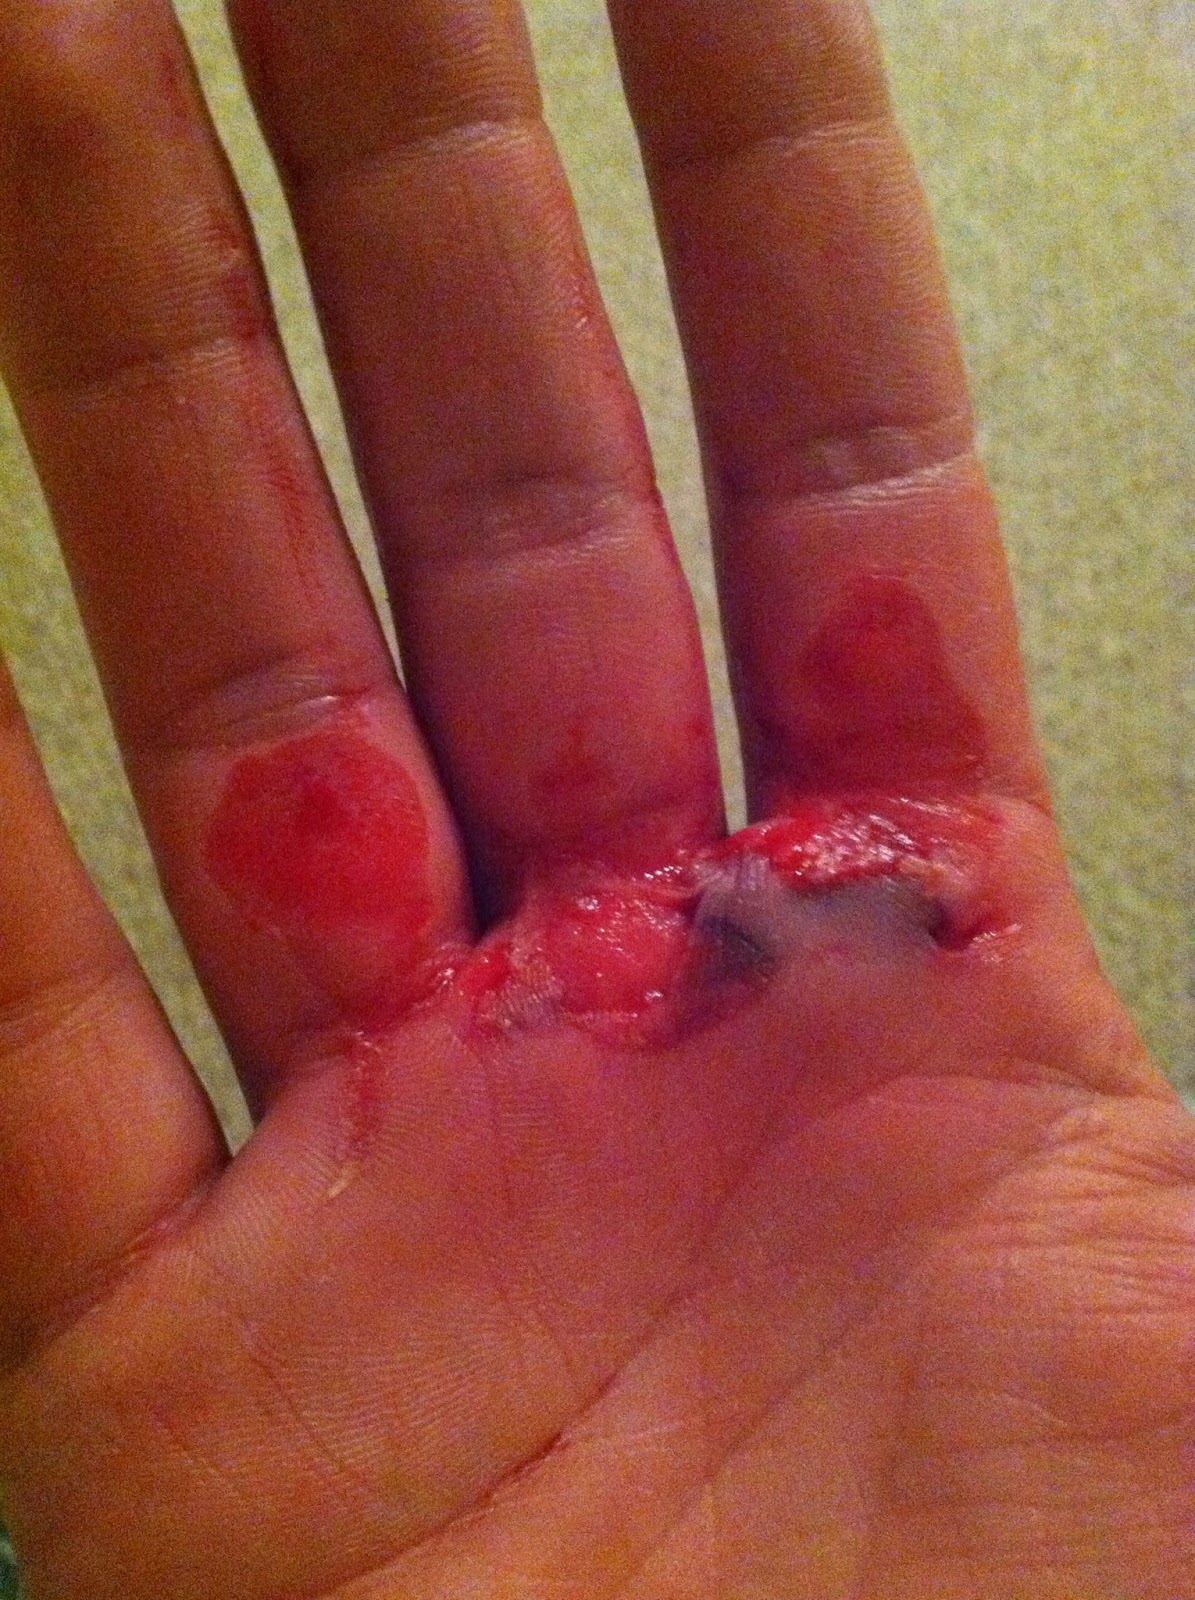 |
| Gross |
 |
| A Few Weeks Later |
Note: the safe way to operate a jointer is to use paddles or push sticks to move boards along. Also, you should only operate a jointer that has a safety guard in place. I have learned my lesson the hard way and will not touch Butch without proper safety equipment.
It took over a month for my hand to heal and I doubted at times whether I would ever finish the BBs. Fortunately for me, I had my cheerleaders. Yaya asked me on a daily basis when I was going to work on her BB. Lulu even got in on the act on occasion, and the beds were never too far from my mind.
After returning from some summer adventures I figured if I didn't get the BBs done soon, I may have to give them to Yaya for a wedding gift and that seemed a little ridiculous. After all, who would want to sleep on a lower bunk as an adult? That would be no way to promote marital harmony. I was not going to drive a wedge between Yaya and the future Mr. Right. So, I promptly got to work.
I decided to use some paneling that we had leftover in the garage from another project to create the beds facade. I also modified the plan to include rectangular windows that looked more like a craftsman home. I love the look of craftsman homes and since I am not currently living in one, I could create a pseudo one in our home.

When I had finished the front and back sides of the BBs it was time to make the stairs. Miraculously, the stairs came from one sheet of 3/4 plywood. They are awesome and have storage in the sides. Doing the railing was a challenge for me, but I really like how it turned out.
Next, after completing some trim work, it was time to prime the whole thing. We put the pieces together in the back yard and I spent some time with the paint sprayer turning everything white. After the primer dried it was time for it to go inside! Each piece was fairly heavy, but the front facade was hernia inducing! Nellie was a trooper and helped me to navigate it up the stairs late on a Saturday night.

Once it was put together it was time to make it beautiful. First we needed a roof:

Then it was time to paint. We took a trip to our neighborhood Walmart with the kids to pick out the colors. We chose Kermit Green, Miss Piggy Pink, and Purple. We also picked up some really cool sparkly paint that is a clear coat with glitter mixed in.

After a few nights of painting it was ready for some lights and pennants. We also bought some drawers from Ikea, put them on casters and made drawer fronts for them. Nellie found some cute little rugs for the stairs, and for good measure we added a light fixture on the front and a working light switch! Since I couldn't find a light fixture that was the right size that I liked, I ended up making one instead. Yaya loves to turn it on and off ad nauseam.

Overall, I would say it has been the most satisfying of my projects so far. The girls love it and it makes me feel like a good father whenever they talk about it. When we got home from a Disney trip last week, the first thing the girls did was run upstairs to their beds. They cheered when they saw them again, like they'd been worried they had been a dream.
If I had it to do over again: I probably wouldn't have tried to go the cheapest route possible because it ended up being a pain. Total cost to do everything, including paint was probably around 350-400. (Partially because I chose not to do a full back wall.)
Oh my, the hand in the power tool made me cringe. You may recall my father crippled himself on a table saw he was very familiar with .... ouch
ReplyDeleteOtherwise what an amazing project .... LOVE IT!
Ya, I flinched in the same place, sis!
ReplyDeleteLove the beds!
Does this mean that Perkins Chaos is now kaput? The bunk beds look fantastic!
ReplyDeletePerkins family chaos is on hold? PFC was more just mine, Nellie and I are both going to write on this one.
ReplyDeleteNow add a friends list so that Marie and I can sign up.
ReplyDeleteHow do I add a friends list?
ReplyDelete